Posts

vegetarian pantry

Alongside the usual savory and sweet items that every pantry needs, there are a few ingredients that are particularly useful for vegetarians and vegans, as well as those wanting to eat more meatless meals.

All of these items are ideal for adding protein, texture, and flavor to what you’re cooking.

Each household’s pantry will vary according to personal taste, ethnic background, and food allergies, but these 15 items are a great way to get started.

vegetarian pantry1. Beans

I like to keep a variety of dried or canned beans, but I always make sure my pantry has at least two: lentils and chickpeas. Lentils cook quickly and are great additions to soups, pilafs, and salads. I like to throw chickpeas into pasta dishes and vegetable braises and stews. Pinto, black, kidney, and cannellini beans are also good to have on hand.

2. Grains

Using a variety of grains lends nutrition, texture, flavor, and makes vegetarian and vegan meals more interesting. I like to keep my pantry stocked with brown rice, white rice, quinoa, spelt, farro, millet, and bulgur.

3. Tempeh

Once you know how to prepare it, tempeh can be one of the best staple sources of protein. It can be refrigerated for a week or two (check the date on the package) and will keep up to several months in the freezer.

4. Tofu

Like tempeh, tofu is not strictly a pantry item, but it’s an essential for vegetarian kitchens. I like to keep blocks of refrigerated extra firm tofu for baking and frying, vacuum-packed silken tofu to blend into dressings and puddings, and dried tofu for soups and stir-fries.

5. Nuts

I always have almonds and cashews and try to keep pistachios and pine nuts around, too. Whole or chopped nuts can be used in salads and grain dishes. Ground nuts can add body to lasagna. And there’s always pesto. Extend the life and freshness of nuts by keeping them in the freezer.

6. Dried fruits

Raisins, dried apricots, and dates are not only great for snacking, but they can add unexpected and delicious flavor to grain dishes, vegetable braises, and sautéed greens.

7. Vegetable stock

I prefer to make stock from scratch and keep it in the freezer. But if you don’t have the time or inclination, there are plenty of good store-bought options.

8. Nutritional yeast

Nutritional yeast is somewhat of a new pantry item for me, though I’m very quickly coming to love it. It can be used in sauces or as a coating for tofu, and sprinkled on potatoes and popcorn.

9. Miso

I like to keep both light and dark miso paste in the refrigerator for different degrees of savoriness, but if I had to choose just one, it would be the mellow white variety. Miso makes excellent soup as well as dressings for salad, vegetables, and tofu.

10. Tahini

Tahini, or sesame paste, often works in conjunction with miso in my kitchen. A quick tahini-miso sauce (try adding lemon juice and garlic, too) can be poured over steamed vegetables, tofu, or tempeh for simple weeknight dinners.

11. Dried sea vegetables

I like to keep several kinds of seaweed, from sheets of nori that can be wrapped around rice and vegetables, to kelp and kombu that add flavor to broth, to hijiki that can be reconstituted and used in salads and vegetable dishes.

12. Coconut oil

From making rich curries and roasting vegetables, to searing tofu and even baking, coconut oil is super versatile.

13. Maple syrup

Maple syrup is my favorite natural sweetener. It’s perfect for baking, making dressing and glazes, and of course, you can never use too much of it on pancakes.

14. Ground flax seeds

Flax seeds are super nutritious and loaded with fiber and Omega-3 fatty acids. I love them stirred in my oats, mixed into smoothies, and baked into breads and muffins. And, combined with a little bit of water, ground flax also works as an egg substitute.


Blog post written by Trainer, Sarah Oliver


VIM is now offering nutrition services with Trainer & Nutrition Coach, Christine Galvin!

Click below to find out how you can benefit from 1 on 1 Nutrition Coaching!

[button link=”https://vimfitness.com/nutrition/” text=”LEARN MORE” color=”green” size=”large” fullwidth=”true”]


memorial day cookout

With Memorial Day right around the corner, it’s time to start planning the menu!

Memorial Day is a great excuse for fun, sun and of course, grilling. It the best way to kick off the summer!

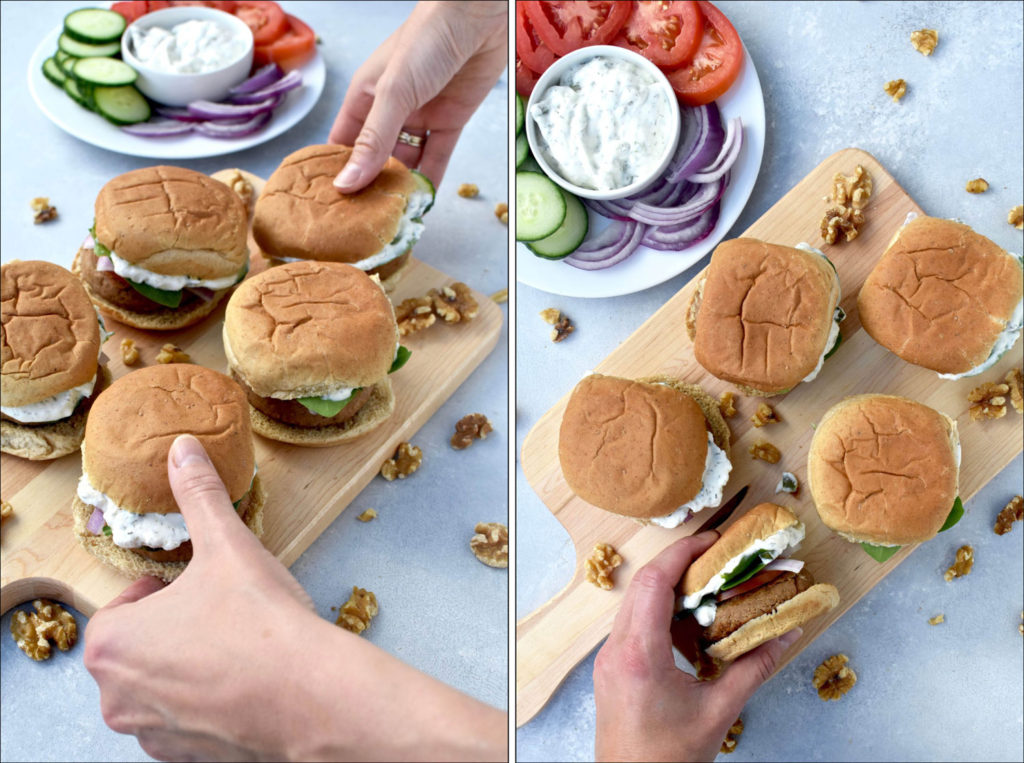
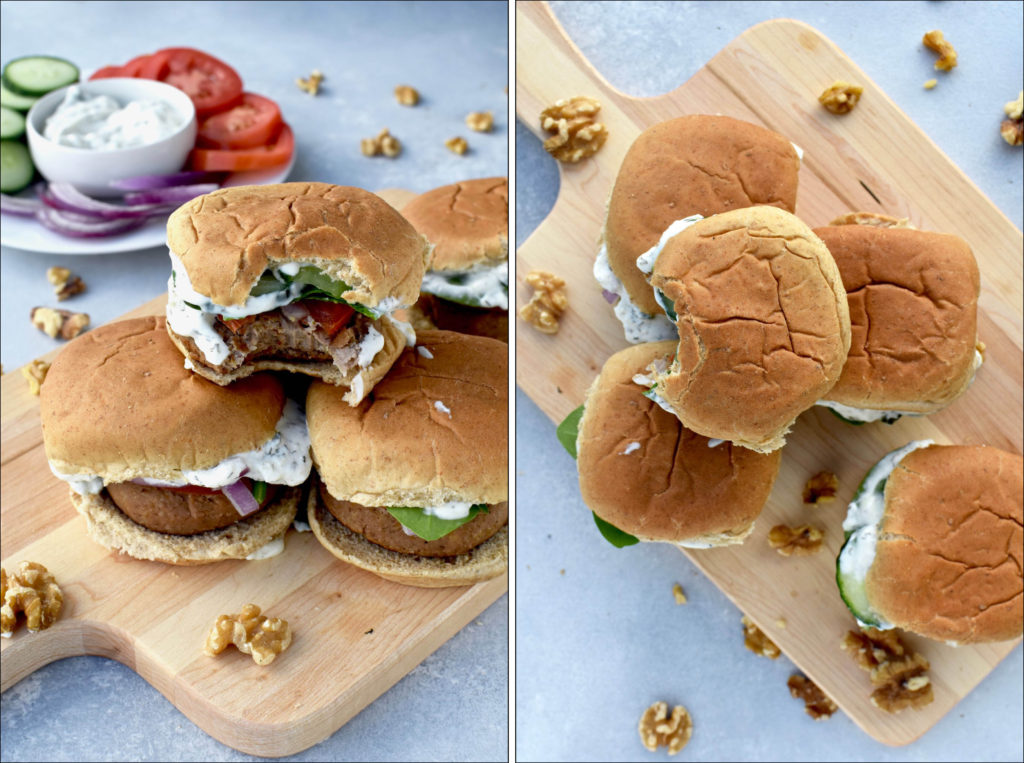
But there’s no need to limit yourself to the usual beef burgers and hot dogs. If you’re hosting for a plant-based guest, or maybe just looking for a healthier alternative, these Greek Walnut Sliders are the perfect addition to your cookout!

memorial day cookout

These Greek Walnut Sliders are hearty like a true meat-based burger but are packed with good fat and plant-based protein. I’m certain even the biggest meat eaters in attendance are going to love them! It’s especially appropriate to cook up a Mediterranean-style dish for this year’s Memorial Day celebration because it’s also Mediterranean Diet Month!

For those that are unfamiliar with the Mediterranean Diet, it’s an eating pattern that focuses on fresh, whole foods encouraging individuals to include whole grains, fruits, vegetables, beans, herbs, spices, nuts, healthy fats and water in their daily diets. The diet also recommends seafood consumption at least twice a week as well as dairy foods, eggs and poultry in moderation. Red meat and sweets are treated more like condiments and are infrequently consumed.

Numerous studies have connected certain Mediterranean-eating patterns with lifelong good health. You can read more about the studies supporting the health benefits of the Mediterranean here.

memorial day cookout

Given the Greek base of these sliders, you can top them with traditional Greek flavors: tzatziki sauce, cucumbers, red onion and lettuce. It’s the perfect way to finish off a delicious slider. However, feel free to go crazy with the toppings that speak to you – olives, hummus, green peppers…the sky’s the limit!

Greek Walnut Sliders

Yield: 6 sliders Serving Size: 1 slider on a wheat bun with desired toppings

Ingredients

  • 1/2 cup chopped walnuts
  • 1/2 cup panko bread crumbs
  • 1/3 cup crumbled feta cheese
  • 2 eggs
  • 2 garlic cloves
  • 1 teaspoon oregano
  • 1/4 teaspoon salt and freshly ground black pepper
  • 1 15 oz. can chickpeas, rinsed and drained
  • 1 teaspoon olive oil
  • 6 wheat slider buns
  • Toppings: freshly sliced cucumber, tzatziki sauce, tomato, red onion, lettuce

Instructions

  1. Place walnuts, bread crumbs, feta*, eggs, garlic cloves, oregano, salt and pepper together into a food processor and blend until well combined. Place chickpeas into the mixture and pulse until combined (it’s okay for a few chunks of chickpeas to remain).
  2. Transfer to a bowl and cover with plastic wrap. Refrigerate at least one hour or overnight.
  3. After refrigeration, remove and spoon two tablespoons of the mixture out, rolling into a ball between the palms of your hand, then flattening to about ½ inch thick disc.
  4. Heat 1 teaspoon olive oil in a large pan over medium high heat. Once oil is heated, place burgers into the pan, cooking on each side until browned (about 4-6 minutes each side or until the thermometer reads 160° F).
  5. Additionally, you may grill the burgers. To do so: place burgers over medium heat, lower the cover and cook about 3-5 minutes. Lift grill cover, flip burgers and cook for another 3-5 minutes on the other side or until a thermometer reads 160° F.
  6. Place cooked burger on a wheat slider bun and top with toppings of choice. Serve immediately.

Adapted from Cait’s Plate


Blog post written by Trainer, Sarah Oliver


VIM is now offering nutrition services with Trainer & Nutrition Coach, Christine Galvin!

Click below to find out how you can benefit from 1 on 1 Nutrition Coaching!

[button link=”https://vimfitness.com/nutrition/” text=”LEARN MORE” color=”green” size=”large” fullwidth=”true”]
 

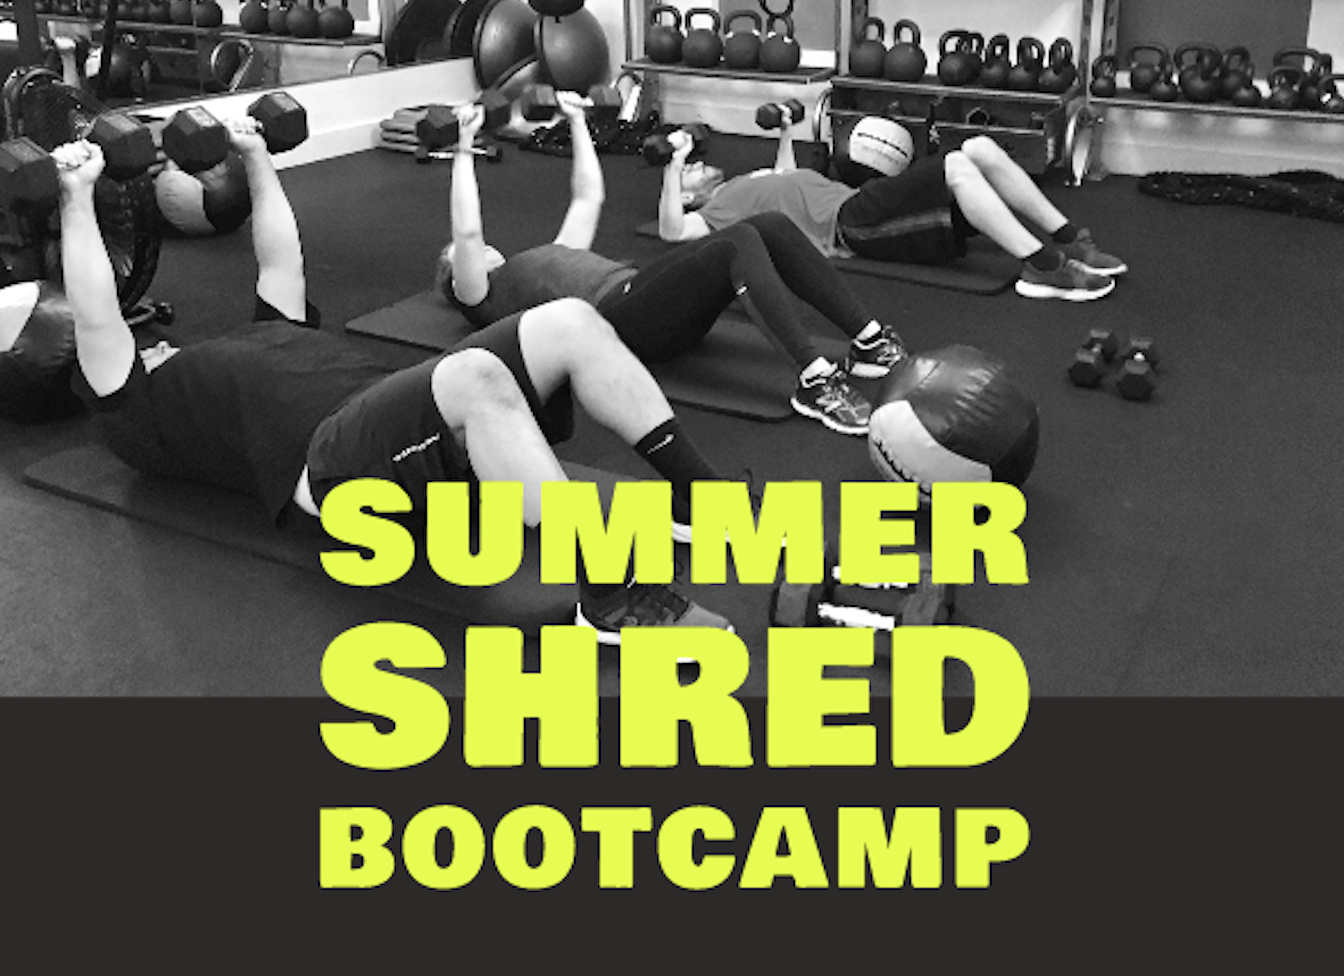
summer shred

Say goodbye to those extra lbs with VIM this Summer at our Summer Shred Boot Camp!

JUNE 15 – AUGUST 15

Presale: May 16 – June 14

YOU GET:

  • Unlimited Small Group Training
  • Unlimited Team Training Classes
  • Nutritional Guidance from in-house Nutritional Coach, Christine Galvin

ONLY $249! ($400 VALUE)

Want in? Contact Tyler to sign up!

[contactform email=”[email protected]”]


DNA sweet tooth

If since your early days, you’ve found yourself drawn to sweets, your DNA may be behind it.

(I personally, didn’t need a DNA test for this one, everyone in my family knows I’m a chocoholic!)

Ignoring these cravings and blaming your lack of self-control is likely not the answer.

So what is?

It could be that you have a FGF21 gene variant. A study published in Cell Metabolism shows that if you have a variant of this gene, you are 20% more likely to enjoy and seek out sugary substances.

You may not be a “super-taster.” Other research has shown that some people (25% of the population) are what are called “super-tasters,” and these people are extremely sensitive to bitter foods. Super-tasters are more sensitive to bitter tastes simply because they have more taste papillae and taste receptors on their tongues that make them more sensitive to bitter tastes. They’re also more sensitive to sweet, salty and umami tastes, but to a lesser extent. They tend to have a reduced preference for sweet and high fat foods. (Super-tasters also tend to consume more salt then non-tasters because salt masks bitter flavors.)

But don’t get down! Remember, it’s always possible to learn to like healthier, less sugary sweets, even if you have a deep-rooted sweet tooth – no matter what kind of taster you are! Super-tasters, non-tasters and everyone in between have one thing in common; their taste buds regenerate in about 10 days. So if you notice sugar cravings start to subside after a few weeks on a whole-foods diet, this could be why!

The great news is that none of us are doomed by our sweet- tooth genetics. By eating a diet rich in plant-based foods and opt for naturally sweet foods instead of those with added sugars, you’ll soon find your sweet cravings subside!


Blog post written by Trainer, Sarah Oliver


VIM is now offering nutrition services with Trainer & Nutrition Coach, Christine Galvin!

Click below to find out how you can benefit from 1 on 1 Nutrition Coaching!

[button link=”https://vimfitness.com/nutrition/” text=”LEARN MORE” color=”green” size=”large” fullwidth=”true”]
 

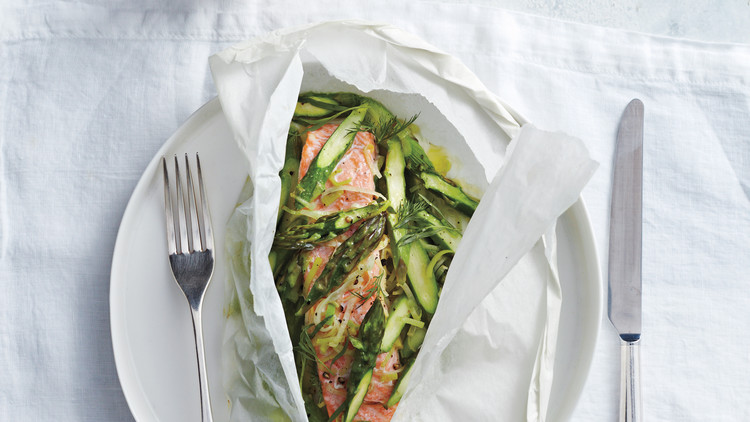
meal plan

To be successful at anything requires a plan, and that includes eating right!

Without a meal plan, it’s a whole lot easier to order take-out trap again… only to realize you made dinner once this week, and it was or cereal.

Use the weekend to your advantage and plan your meals for the week ahead of time. There’s no one way to do it, and you definitely don’t have to be super strict about it 100% of the time. But even if you just plan a few dinner and snack options, you’ll be on track to a healthier lifestyle!

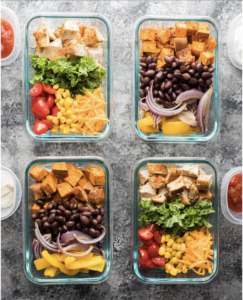
meal planMap out your meals for the week

If you’re new to meal planning, you might want to start small by just planning out one type of meal for the week, such as breakfast. Once you master it, add another meal to the plan. Try setting aside 10 minutes on Friday afternoon or evening to map out the coming week. When planning your meals, consider the following:

  • Look at your calendar. Do you have a lunch meeting on Monday? Are you meeting friends for dinner Thursday? You can subtract those meals from the weekly meal plan so you know how many meals you really need to make.
  • What kind of meals do you enjoy eating? If it’s cold out, consider making soup or roasted veggies. You want to have food around that you actually want to eat! If you can, think about what foods are in season and use one or two of them as the base for your meal.
  • Spend a little time each week going through your recipes or searching new ones online or on social media. I recommend this website! Just keep in mind your cooking strengths and how much time you have for cooking!
  • If you’re lacking inspiration, consider theme nights! It could be Meatless Monday, Taco Tuesday, Breakfast for Dinner, Pasta Night, leftovers… whatever you like. Sticking to a theme can make coming up with meals a lot simpler.
  • Check your pantry, freezer and refrigerator for inspiration. Is there some baby bok choy in the produce drawer just waiting to be used up? Great, then make a stir-fry. How about that can of black beans in the pantry and the chicken thighs in the freezer? Sounds like ingredients for Taco Tuesday!

Go Shopping (Saturday)!

Now that you know what you’re going to eat, make a list! Check your fridge and pantry to see what you already have, then make a list of anything else you need. That will also reduce the chance of impulse buying or wandering aimlessly around the market looking for some inspiration. Go through your spice and seasoning drawer to purchase or replace any old spices, except for salt and pepper (if your spices are over one year old, it’s time to replace them). Seasoned food just tastes better!

If you can, try to stop by your local farmers’ market. If you you’re pressed for time, make a one-stop trip to the grocery store. Shop in the morning to avoid busy grocery store lines in the afternoon and early evening.

Also, make sure to go through your cabinet full of containers to make sure you have enough food storage for the week. You might want to consider purchasing a new set of stackable containers.

Prep Time (Sunday)

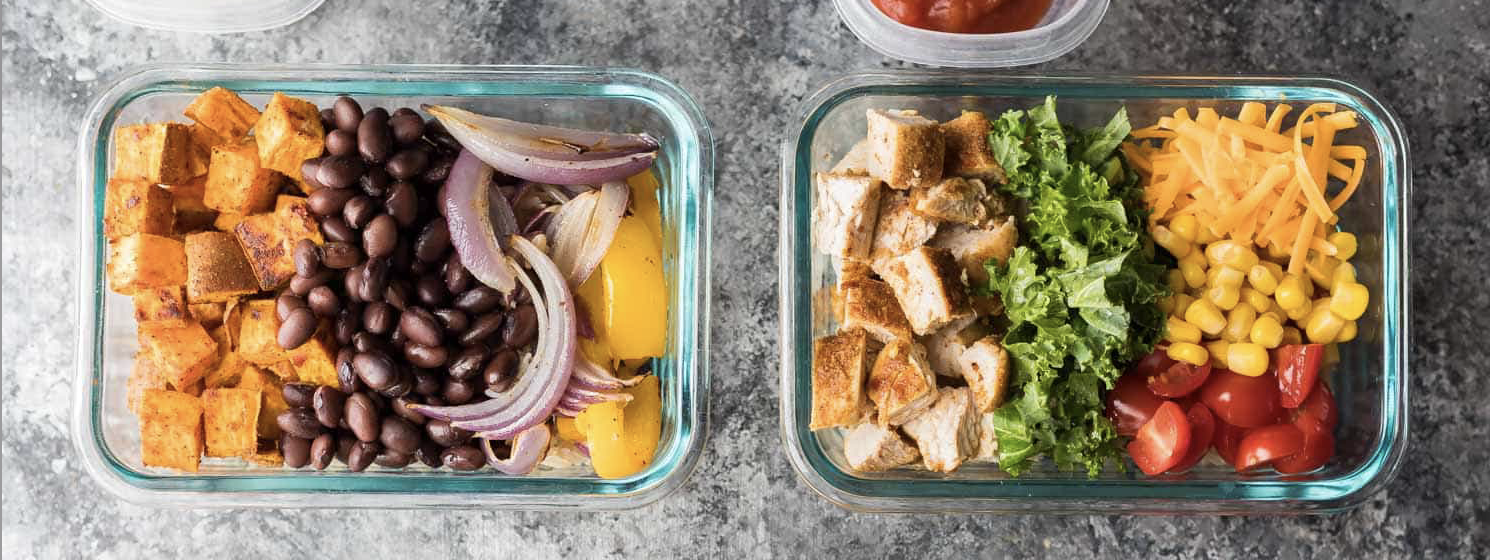
Part of meal prep is deciding if you want to make everything for the whole week, prep some of the meals, or just chop up veggies and organize ingredients to be cooked fresh on the night you want a particular recipe. Many people like to get it all done on Sunday so all you need to do each night is microwave it. It will take a little more time out of your Sunday, but you’ll spend less time in the kitchen the rest of your week. Here are some prep tips!

Consider cooking double batches of recipes and freezing half, which you can then take out in a few weeks and reheat.
Sheet-pan meals are ideal if you want little to no clean-up. Just line a sheet pan with aluminum foil and load it up with veggies and a protein. Season and bake in the oven until done. When cool, load it into containers and recycle the foil. No clean-up!
One-pot meals are another great way to cook with little clean-up. Sauté your veggies in some heart-healthy oil, add brown rice or quinoa, your protein of choice, broth, and seasonings and then cover with a lid and simmer until done.
Use your slow-cooker to make soups, chili or stews. You can load up the slow-cooker in the morning before you leave and set it to cook on LOW for 8-10 hours. When you get home, all you have to do is serve. Make extra so leftovers can be enjoyed for days to come.

Sample Meal Plan

Breakfast: frittata (for Monday, Wednesday and Friday) and smoothie (Tuesday, Thursday)

Lunch: Leftovers from last night’s dinner for lunch. You can turn it into a sandwich, mix and match, or just eat it exactly the same as before!

Dinner:

  • Meatless Monday—vegetarian chili
  • Taco Tuesday—chicken, black beans, shredded lettuce, salsa, guacamole/avocado and mini corn tortillas
  • Breakfast-for-Dinner Wednesday—scrambled eggs topped with salsa, toast and fruit
  • Crock-pot Thursday—simmer chicken thighs with 1 cup frozen organic corn, 1 can black beans, 1 container fresh salsa, cumin, chili powder, smoked paprika and broth. Cook on LOW for 8-10 hours, then shred chicken and mix everything together. Top with a dollop of plain Greek yogurt or sour cream.
  • Pizza Friday—buy a store-bought whole grain crust or make your own crust and top with marinara or homemade pesto, parmesan cheese and whatever veggies you have on hand. Bake until cheese is melted and crust is crunchy.

Snacks (optional): prepare snack-size baggies with mixed nuts or make containers of chopped veggies and hummus. You could even bake your favorite banana bread recipe and cut it into single servings for dessert every night!

Once you get the hang of it, using your weekend to plan and prep your meals for the week will save you time, money and stress. That means more time to enjoy your meals, squeeze in that workout after work, or just relax with friends and family!


Blog post written by Trainer, Sarah Oliver


VIM is now offering nutrition services with Trainer & Nutrition Coach, Christine Galvin!

Click below to find out how you can benefit from 1 on 1 Nutrition Coaching!

[button link=”https://vimfitness.com/nutrition/” text=”LEARN MORE” color=”green” size=”large” fullwidth=”true”]
 

mindful eating

The benefits of mindfulness and meditation are seemingly endless.

The mental and physical benefits of slowing down, breathing and quieting the mind are advertised across every form of social media, news feed and literature. But how, exactly, does mindfulness apply to food? How can we practice mindful eating?

First of all, your stomach and your mind are connected by what’s called the enteric nervous system. You know that feeling when you look up #foodporn and then your belly starts to grumble? Yup, that’s it. It also works the other way around: when you’re eating nutrient-dense food, you’re happier. When you gorge on some greasy fried food, you get an endorphin high for a bit, and then your mood plummets.

Often times people underestimate the power the mind can have over choices, emotions and physical feelings. But if these examples are not enough, try it yourself. If you pause, close your eyes, and just focus on your breath for a few minutes, you may notice your responses to hunger cues have changed. Because when you start to tune in to your mind and body, the distracting stimuli of the world fade away. Now you recognize whether you’re actually hungry, or if that was just a tasty-looking photo.

mindful eating

Mindfulness and meditation take practice, just like lifting weights.

Your brain is like a muscle that needs to be flexed and challenged often if it is to get stronger or develop a new habit. A short, simple, daily meditation practice can help change your attitude towards food and actually aid in weight loss.

If weight loss is not your goal, meditation can help you better enjoy your food, and become more aware of how your body feels in response to food.

After a few weeks of daily meditation, usually it starts to become easier to quiet your mind. Don’t get frustrated if it seems like a daunting task that never improves – this is natural and will ease with practice. You just have to let go of your goals, return to your breath, and let yourself make mistakes. It’s ok! Let the thoughts come and go.

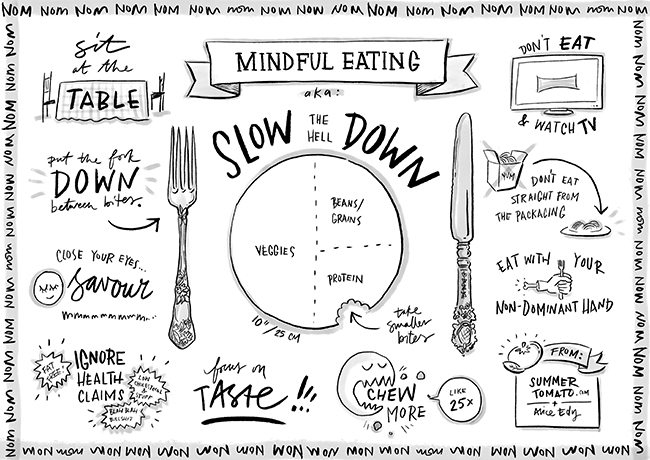
In our always-working society, people are multitasking while eating. If you can, try to put away distractions for just 20 minutes and really think about your food. Chew it fully, place your fork down in between every bite. Focus on the flavor, the texture, and how it feels to eat each bite of food. When you’re finished, notice how you feel. Do you still feel hungry? Are you full or satisfied? By practicing mindfulness when eating, you can become more in-tune with your hunger cues. You may find you’re not as hungry as you initially thought, or that a certain food is more flavorful than you realised. Mindful eating makes you not only feel more satisfied, but also more grateful for the nourishment you’re getting and more positive after your meal has ended.

I could attempt to list all the holistic health benefits of meditation, but I will leave that for your googling pleasures. But today, challenge yourself to one meal or snack where you remove all distractions, slow down and truly taste your food.

By incorporating mindfulness and meditation into your life, you’ll find you have no need for crash diets or binges; your body knows exactly how to eat.


Blog post written by Trainer, Sarah Oliver


VIM is now offering nutrition services with Trainer & Nutrition Coach, Christine Galvin!

Click below to find out how you can benefit from 1 on 1 Nutrition Coaching!

[button link=”https://vimfitness.com/nutrition/” text=”LEARN MORE” color=”green” size=”large” fullwidth=”true”]
 

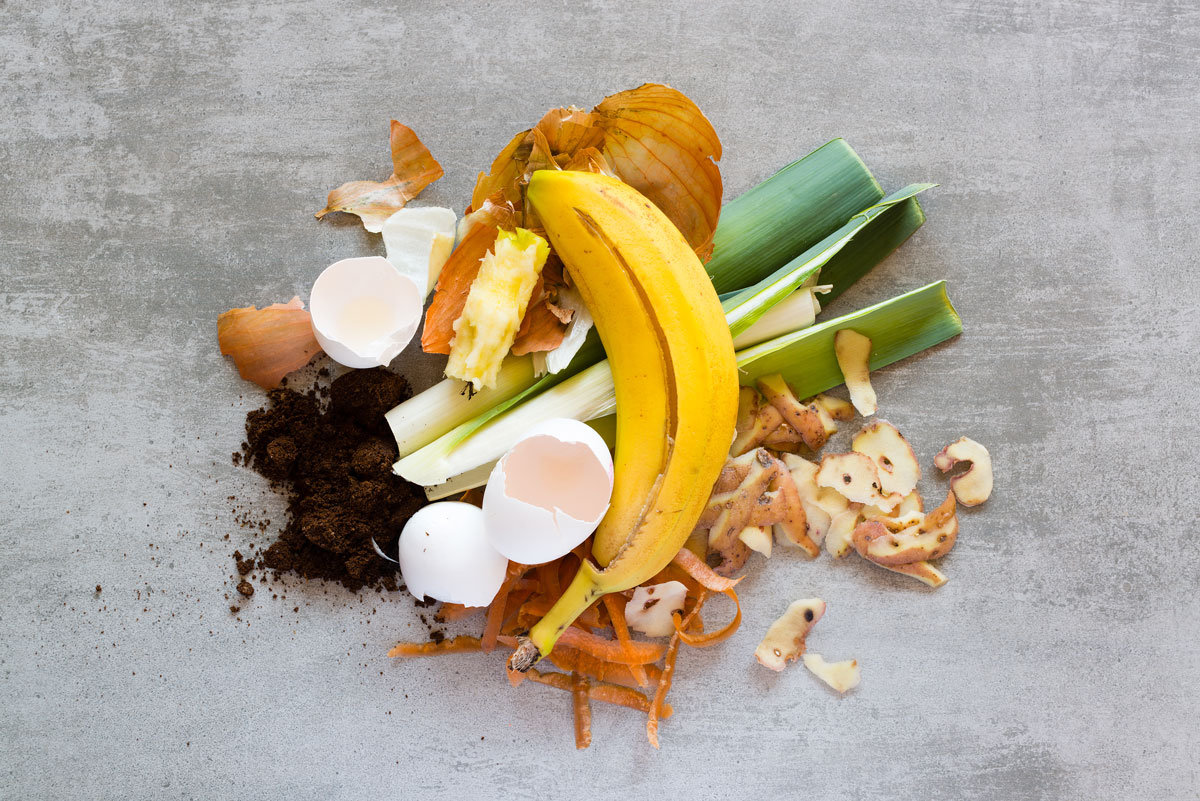
food waste compost

Most people don’t realize how much food they throw away every day — from uneaten leftovers to spoiled produce.

Turns out, about 40% of our food ends up wasted, and about 95 percent of that ends up in landfills or combustion facilities. In 2014, we disposed of more than 38 million tons of food waste. But it doesn’t have to be this way!

There’s a lot we can do as mindful consumers to cut back on wasted food. By managing food sustainably and reducing waste, we can help businesses and consumers save money, provide a bridge in our communities for those who do not have enough to eat, and conserve resources for future generations.

Tips to Reduce Food Waste:

Plan Smarter:
Keep a list of meals and their ingredients that your household already enjoys. That way, you can easily choose, shop for and prepare meals.
Make your shopping list based on how many meals you’ll eat at home. Will you eat out this week? How often?
Plan your meals for the week before you go shopping and buy only the things needed for those meals.
Include quantities on your shopping list noting how many meals you’ll make with each item to avoid overbuying. For example: salad greens – enough for two lunches.
Look in your refrigerator and cupboards first to avoid buying food you already have, make a list each week of what needs to be used up and plan upcoming meals around it.
Buy only what you need and will use. Buying in bulk only saves money if you are able to use the food before it spoils.

food storage wasteStore Properly:
Find out which fruits and vegetables need to be refrigerated and which don’t to help them stay fresh longer.
Freeze, preserve, or can surplus fruits and vegetables – especially abundant seasonal produce.
Many fruits give off natural gases as they ripen, making other nearby produce spoil faster. Store bananas, apples, and tomatoes by themselves, and store fruits and vegetables in different bins.
Wait to wash berries until you want to eat them to prevent mold.
If you like to eat fruit at room temperature, but it should be stored in the refrigerator for maximum freshness, take what you’ll eat for the day out of the refrigerator in the morning.

Prep Tips:
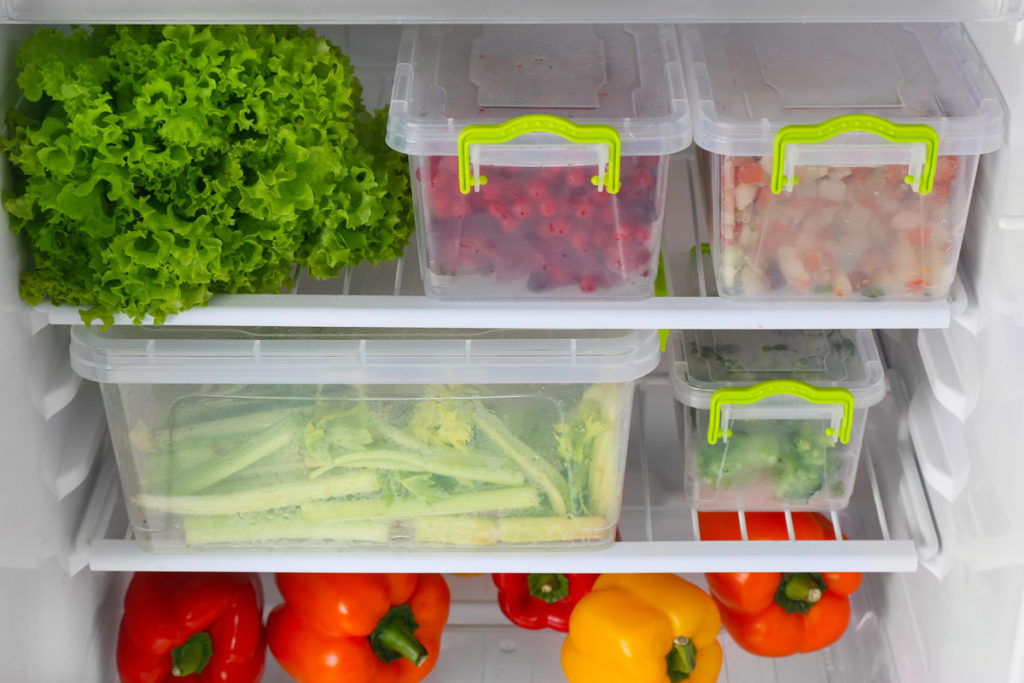
When you get home from the store, take the time to wash, dry, chop, dice, slice, and place your fresh food items in clear storage containers for snacks and easy cooking.
Befriend your freezer and visit it often. For example,
Freeze food such as bread, sliced fruit, or meat that you know you won’t be able to eat in time.
Cut your time in the kitchen by preparing and freezing meals ahead of time.
Prepare and cook perishable items, then freeze them for use throughout the month. For example, bake and freeze chicken breasts or fry and freeze taco meat.

Thrifty Secrets:
Shop in your refrigerator first! Cook or eat what you already have at home before buying more.
Have produce that’s past its prime? It may still be fine for cooking. Think soups, casseroles, stir fries, sauces, baked goods, pancakes or smoothies.
If safe and healthy, use the edible parts of food that you normally do not eat. For example, stale bread can be used to make croutons, beet tops can be sautéed for a delicious side dish, and vegetable scraps can be made into stock.
Learn the difference between “sell-by,” “use-by,” “best-by,” and expiration dates.
Are you likely to have leftovers from any of your meals? Plan an “eat the leftovers” night each week.
At restaurants, order only what you can finish by asking about portion sizes and be aware of side dishes included with entrees. Take home the leftovers and keep them for or to make your next meal.
At all-you-can-eat buffets, take only what you can eat.

I hope these tips are helpful as we enter the season of abundant produce! Next time you open the fridge or grocery store door, be mindful of how much food you can consume and how to minimize your wasted food.


Blog post written by Trainer, Sarah Oliver


VIM is now offering nutrition services with Trainer & Nutrition Coach, Christine Galvin!

Click below to find out how you can benefit from 1 on 1 Nutrition Coaching!

[button link=”https://vimfitness.com/nutrition/” text=”LEARN MORE” color=”green” size=”large” fullwidth=”true”]


fava bean recipe

Will it ever feel like Spring again? This cold weather has me still eating all the winter root vegetables.

However, it is technically spring, which means there are some fresh new foods growing and ready to start eating! Some of these vegetables are less common and harder to find in the grocery store, but you will likely find local farmers growing them. It’s time to begin spring cleaning, starting with cleaning up your diet!

What’s in season in Massachusetts at this time of year? Here’s a short list:

  • Mint
  • Morels
  • Mushrooms
  • Nettles
  • Asparagus
  • Dandelion greens
  • Fava beans
  • Fennel
  • Kale
  • Lemons
  • Rhubarb

I have no idea how to use morels or nettles, so if you have any ideas, let me know! I’m going to focus today’s blog on a spring recipe that involves the nutrient-dense veggie: fava beans!

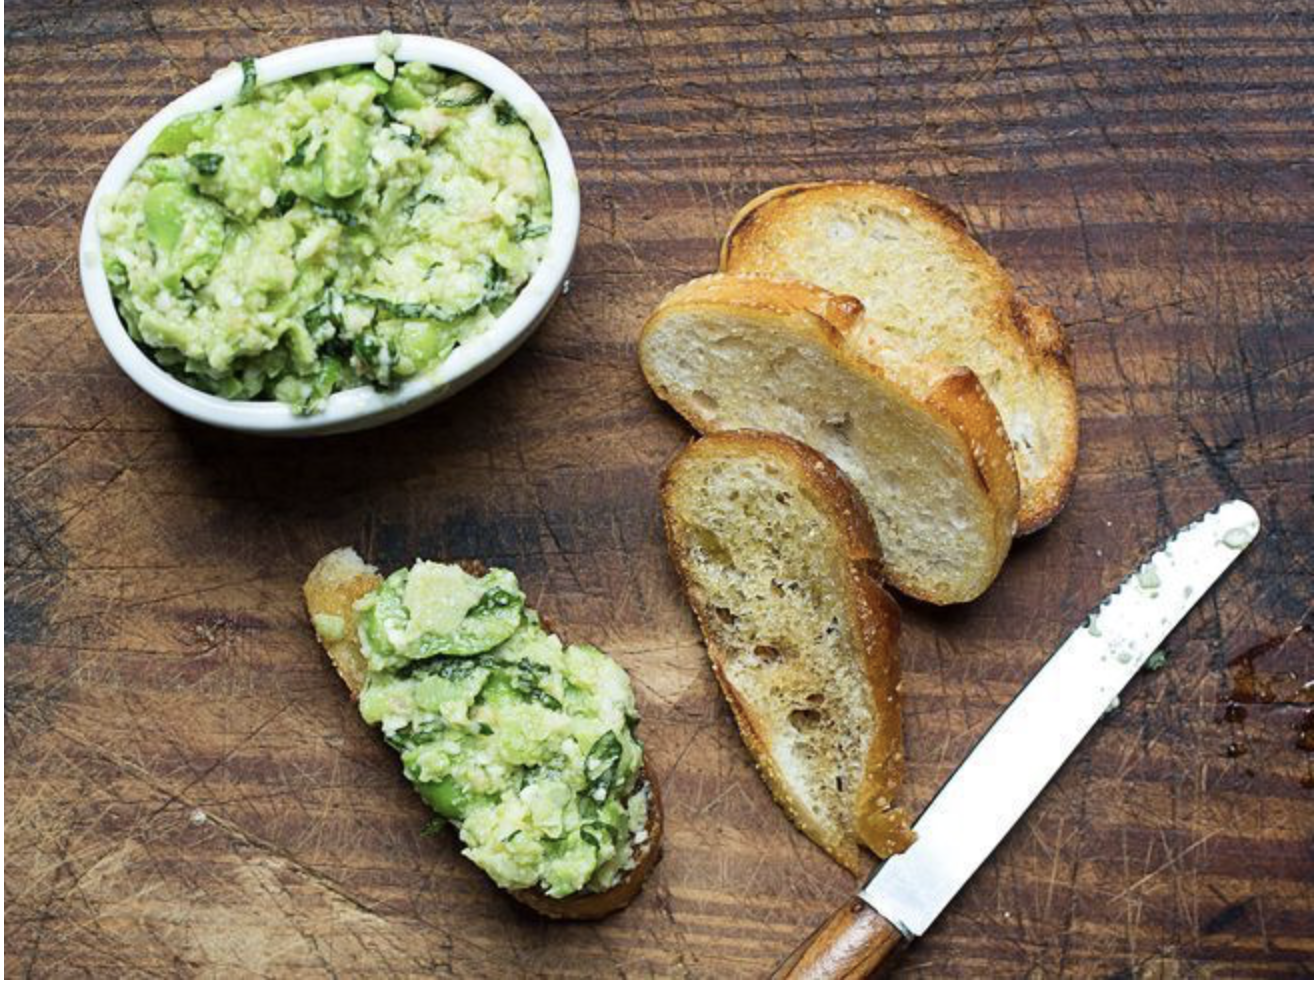
Spring Fava Bean & Mint Pesto Recipe adapted from Saveur

Ingredients:

  • 2 lb. fresh fava beans in their pods
  • Kosher salt
  • 2 tbsp. Marcona almonds, roughly chopped
  • 2 anchovy fillets in oil, roughly chopped
  • 1 garlic clove, roughly chopped
  • 6 tbsp. Agrumato lemon oil
  • 1⁄4 cup finely grated Parmigiano-Reggiano
  • 1⁄4 cup loosely packed mint leaves, thinly sliced
  • Finely grated zest of 1 lemon, plus 2 Tbsp. juice

Steps:

  1. Shuck the fava beans from their pods and then peel off and discard their shells. You should have about 2 cups cleaned fava beans.
  2. In a medium saucepan of boiling, salted water, cook the fava beans until bright green, 30 seconds. Using a slotted spoon, transfer to a bowl of ice water and let sit until chilled, 1 minute. Drain and roughly chop the fava beans.
  3. In a mortar, pound the almonds, anchovies, and garlic until evenly combined, then add 2 tablespoons of the lemon oil to loosen the mixture.
  4. Add the reserved fava beans and mash into a coarse purée. Stir in the remaining 4 tablespoons lemon oil, the parmesan, mint, and lemon zest and juice.
  5. Season with salt and serve.

If you’re serving this at your spring gathering, let me know! This pesto looks too good to pass up!


Blog post written by Trainer, Sarah Oliver


VIM is now offering nutrition services with Trainer & Nutrition Coach, Christine Galvin!

Click below to find out how you can benefit from 1 on 1 Nutrition Coaching!

[button link=”https://vimfitness.com/nutrition/” text=”LEARN MORE” color=”green” size=”large” fullwidth=”true”]
 

marathon fuel

It’s finally April in Boston, which means the Boston Marathon is right around the corner!

If you’re one of the brave souls toeing the line on Monday, you don’t want nutrition to undo your hard months of training! Be smart in the days leading up to the race, and make sure you follow these simple ‘Marathon Fuel’ tips the day-of to ensure smooth running!

  1. Top Off the Tank.
    Midrun fueling will help maintain your energy levels over the course of 26.2 miles, but your pre-run meals are crucial. For the two to three meals before your race, choose high-carb, moderate-protein, and low-fat and fiber options.
  2. Don’t eat anything new.
    You know your body best, so in the days leading up to the marathon stick to foods you’ve eaten before and that you know your stomach can easily digest. For some runners that could mean avoiding high-fiber foods, high-fat foods, or dairy. Eating high-carb foods, such as pasta, rice, and potatoes, will ensure your glycogen stores are stocked for race day, but don’t consume a new food just because it’s high in carbohydrates.
  3. Stay hydrated during the race.
    A good general guideline is to drink 3 to 6 ounces of fluid every 15 to 20 minutes. This averages out to grabbing a cup every other mile. Since the first water stop in a race is often very crowded, skip it and get a drink at the second stop.
  4. Take heat into consideration.
    The ideal marathon racing temperature is in the mid-50s, but if the temperature soars into the 70s or 80s on race day as it has in the past, you must drink more. Increase your fluid intake by sipping sports drinks, not just water. The carbs in sports drinks help restock spent energy stores. Most sports drinks will also replace the electrolytes you lose in sweat, helping you avoid hyponatremia (low blood-sodium level caused by excessive water intake).
  5. Develop a race-day nutrition and hydration plan.
    When you’re tired and miles from the finish, you can’t always make the best decisions about refueling. Develop a plan ahead of time so you know what and when you’ll eat and drink. Be sure that plan includes drinking and consuming calories within 45 minutes to an hour after the start. If you wait too long, you might become dehydrated or run out of steam early in the race.
  6. Know Your Mid-Race Fuel
    Trust me, you will need fuel. But make sure you stick with whatever gel, chew, or energy food you have been using in training runs. Whether you use gels or chews, make sure you chase them with a few sips of water. Try taking gels when you’re approaching a water stop. It may also be helpful to consume a gel slowly, over the course of a few minutes. Another way to fuel-up without GI distress, try splitting packs of six chews into two fueling stops. If you decide to have a sports drink at the water stop, try alternating water and sports drink at each fluid stop to avoid consuming too much sugar.
  7. Start your recovery early.
    Refueling after the marathon is essential to help your body recover quickly. Eat or drink about 200 or 300 calories of carbohydrates and some protein within an hour of finishing the marathon. The carbs refuel your muscles with glycogen, and the protein will help repair your muscles. Eat a full meal as soon as you are able to continue the recovery process. And remember to slowly drink fluids to rehydrate after you cross the finish line.

marathon fuel


Blog post written by Trainer, Sarah Oliver


VIM is now offering nutrition services with Trainer & Nutrition Coach, Christine Galvin!

Click below to find out how you can benefit from 1 on 1 Nutrition Coaching!

[button link=”https://vimfitness.com/nutrition/” text=”LEARN MORE” color=”green” size=”large” fullwidth=”true”]